10 minute table runner pdf

Discover the simplicity of creating a stylish table runner in just minutes! This quick project requires minimal fabric and basic sewing skills, perfect for beginners or last-minute gifts․
Overview of the Project
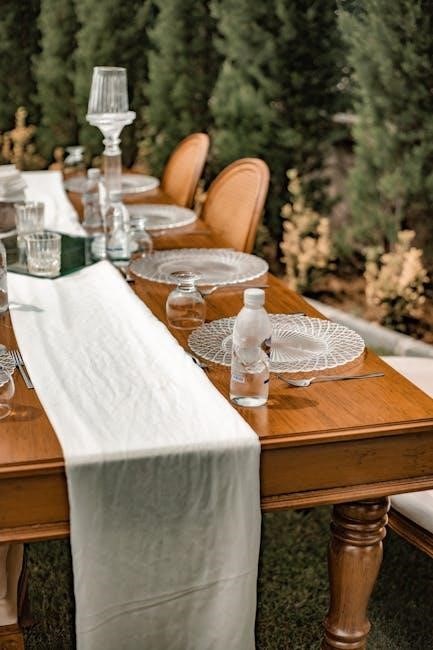
This 10-minute table runner is a quick and easy sewing project designed for beginners or those short on time․ It requires only two fabrics, with minimal yardage, making it perfect for using leftover materials․ The pattern involves simple steps like cutting, stitching, and pressing, resulting in a functional and stylish table runner․ Its reversible design adds versatility, allowing you to switch up the look effortlessly․ The project is ideal for gifts, seasonal decor, or as a practical way to enhance your dining table․ With its fast completion time and straightforward instructions, it’s a great way to practice sewing skills or tackle a quick creative project․
Why Choose the 10 Minute Table Runner Pattern
Opt for the 10-minute table runner pattern for its exceptional ease and efficiency․ Perfect for beginners, it requires only basic sewing skills and minimal fabric․ The quick turnaround makes it ideal for last-minute gifts or home decor updates․ Its simplicity ensures minimal waste, allowing you to use leftover fabric effectively․ The pattern’s flexibility also lets you customize the runner to suit any theme or occasion․ With clear, concise instructions, this project is stress-free and rewarding․ It’s a great way to practice sewing techniques or create something functional in a short time, making it a favorite among crafters and quilters alike․
Key Features of the Pattern
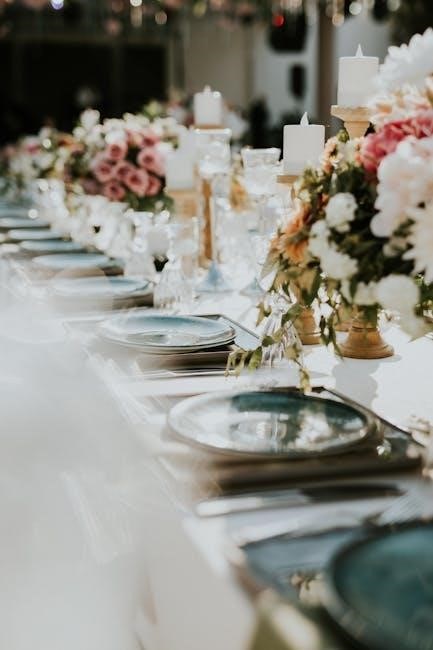
This pattern is designed for speed and simplicity, requiring just 10 minutes to complete․ It uses minimal fabric, making it perfect for scraps or leftover materials․ The design is reversible, offering versatility in styling․ With clear, step-by-step instructions, it’s ideal for beginners․ The pattern allows for customization, such as adding accent strips or coordinating fabrics․ Its compact size makes it suitable for various table settings․ The optional use of batting or interfacing adds flexibility․ The finished runner measures 14×40 inches, providing a elegant touch to any decor․ Its quick completion and ease of use make it a great project for gifts or home decor updates․
Materials Required
For the 10-minute table runner, you’ll need 1/3 yard of theme print fabric and 1/2 yard of coordinating fabric, both at the width of the fabric․ Optional batting or interfacing can be added for texture or stability․ Ensure all fabrics are pre-washed and pressed before cutting for optimal results․
Fabric Requirements
The 10-minute table runner requires 1/3 yard of theme print fabric and 1/2 yard of coordinating fabric, both at the width of the fabric; This ensures a standard size without extra piecing․ The theme fabric serves as the focal point, while the coordinating fabric provides a border and backing․ Choose complementary colors or patterns for a cohesive look․ If the fabrics differ in width, cut them to match for a balanced finish․ Pre-wash and press the fabrics before cutting to remove any shrinkage and ensure crisp seams․ This minimal fabric requirement makes the project accessible and quick to complete, perfect for beginners or last-minute decor updates․
Optional Additions: Batting and Interfacing
Enhance your table runner with optional batting or interfacing for added stability and texture․ Batting provides a soft, padded feel, while interfacing adds structure without bulk․ Both are placed between the fabric layers during assembly․ Batting is ideal for a quilted look, requiring simple straight-line stitching․ Interfacing is great for a crisp finish, especially if using lightweight fabrics․ These additions are optional, allowing you to customize the runner’s feel and durability․ Use cotton batting for breathability or fusible interfacing for easy application․ These elements add minimal time but offer significant improvement in the final product’s quality and appearance, making it suitable for both decorative and functional use․
Tools and Supplies Needed
To complete the 10-minute table runner, you’ll need a few basic sewing tools․ A sewing machine is essential for stitching the long edges quickly․ Additionally, sharp rotary cutters and a cutting mat are recommended for precise fabric cutting․ Scissors and pins are necessary for preparing and aligning the fabric layers․ An iron and ironing board are crucial for pressing seams and achieving a professional finish․ Optional tools include a serger for finishing seams or a walking foot for smooth stitching․ These tools ensure the project is completed efficiently, making it possible to finish in just a few minutes․ Gather these supplies to start crafting your table runner effortlessly․
Step-by-Step Instructions
Cut fabrics to size, place right sides together, and stitch long edges․ Press seams, turn right side out, press flat, and trim ends for a quick finish․
Step 1: Cutting the Fabric
Begin by cutting your fabrics to the required dimensions․ For the theme print, you’ll need a piece measuring 10-12 inches wide, using the full width of the fabric․ The coordinating fabric should be 18 inches wide, also using the full width․ Ensure both fabrics are cut accurately to match in width, as this will simplify the stitching process later․ If your fabrics have different widths, trim them to be consistent․ This step sets the foundation for a professional-looking table runner, so take care to make precise cuts using a rotary cutter and mat for the best results․
Step 2: Placing Right Sides Together
Next, align the two fabric pieces by placing their right sides together․ Ensure the edges are evenly matched, as this step is crucial for a seamless finish․ The theme print and coordinating fabric should lie smoothly against each other, with their widths aligned perfectly․ This step prevents raw edges from being visible in the final runner and ensures a professional appearance․ Gently smooth out any wrinkles to ensure proper alignment before proceeding․ This simple yet important step sets the stage for accurate stitching in the next phase of the project․
Step 3: Stitching the Long Edges
With the fabrics aligned and right sides together, stitch along the long edges using a 1/2-inch seam allowance․ Ensure the edges remain matched as you guide the fabric through the sewing machine․ This step creates a tube-like structure, enclosing the raw edges․ If using batting or interfacing, it should be placed between the fabrics before stitching․ Maintain a steady pace and keep the fabric taut to avoid puckering․ Once stitched, the runner will have a clean, finished appearance along the length․ This step is foundational for achieving a polished final product, so take care to keep your stitches consistent and precise․
Step 4: Pressing the Seam
Next, press the seam allowance away from the center fabric to create a crisp fold․ Lay the runner flat on your ironing board and smooth out any wrinkles․ Ensure the seam is fully opened to avoid bulk․ Pressing at this stage helps the runner lie flat and maintains a professional finish․ Use a hot iron with steam if needed, but avoid scorching the fabric․ This step ensures the runner’s edges are sharp and the fabric drapes evenly․ Proper pressing now makes the next steps easier and ensures a polished final result․ Take your time to press thoroughly, as this is key to the runner’s appearance․
Step 5: Turning the Runner Right Side Out
Carefully turn the runner right side out through one of the open short ends․ Use a blunt object like a chopstick or pencil to gently push out the corners, ensuring they are sharp and well-defined․ Make sure the seam is fully turned and the fabric isn’t bunched up․ Smooth out the runner to ensure even distribution of the fabric․ This step is crucial for achieving a professional finish․ Once turned, the runner should now have a clean, finished appearance with the theme print visible on the front and the coordinating fabric on the back․ Your runner is now taking shape!
Step 6: Pressing the Runner Flat
Lay the runner flat on your ironing board, ensuring the theme print is centered and evenly bordered by the coordinating fabric on both long sides․ Press firmly with your iron to create a crisp fold, working from the center out toward the edges․ Use steam if necessary to ensure a sharp crease․ Make sure the runner lies flat without any wrinkles or bunching․ This step ensures a professional finish and prepares the runner for the final trimming step․ The even pressing will help the runner drape smoothly on your table, showcasing your fabric choices beautifully․ A well-pressed runner makes all the difference in its appearance!

Step 7: Trimming the Short Ends
Once pressed, carefully trim the short ends of the runner to create a clean, professional finish․ Use sharp scissors or a rotary cutter to ensure straight, even cuts․ Align the edges precisely before trimming to maintain symmetry․ If using a rotary cutter, place a ruler alongside the edge as a guide․ Trim slowly and deliberately, removing any excess fabric․ This step ensures the runner has neat, finished ends that complement its overall appearance․ After trimming, your runner is nearly complete and ready for any final touches, such as adding buttons or a reversible design․ Take a moment to admire your handiwork!

Customization Options
Easily customize your table runner by adjusting the length, adding accent strips, or using different fabric combinations․ You can also create a reversible design for added versatility․
Adjusting the Length of the Runner
Adjusting the length of your table runner is simple․ Measure your desired length and cut your fabric accordingly․ If your runner needs to be longer than the standard width of fabric․ Simply calculate the additional length required and add it to both the theme and coordinating fabrics․ For example, if you want a 65-inch runner and your fabric is 42 inches wide, you’ll need an extra 23 inches․ Split this evenly․ Adding 11․5 inches to each fabric piece ensures a balanced design․ This method allows flexibility to suit any table size or decor preference․ Customize effortlessly for a perfect fit!
Adding Accent Strips
Add a decorative touch to your table runner with accent strips․ Cut two strips of fabric to your desired width and length․ Fold each strip in half lengthwise and press to create a crisp edge․ Place these strips along the edges of the backing fabric, aligning the raw edges․ Clip or pin them in place to secure․ Stitch the strips to the backing fabric, ensuring a straight line for a polished look․ This adds a stylish border to your runner․ Use contrasting fabrics for a bold statement or matching tones for a subtle effect․ Accent strips enhance the runner’s visual appeal and provide a professional finish․ Easy to incorporate, they offer endless creative possibilities․ Perfect for personalizing your project!
Using Different Fabric Combinations
Experiment with fabric combinations to create a unique and personalized table runner․ Choose a theme print for the center and a coordinating fabric for the background․ For a bold look, pair contrasting colors or patterns․ Solid fabrics can provide a clean, modern aesthetic, while seasonal prints add festive flair․ Consider using orphan blocks for a patchwork effect․ Ensure fabrics are cut to the same width for a cohesive design․ This versatility allows you to tailor the runner to any decor or occasion․ Mix and match textures, like cotton and linen, for added depth․ Fabric combinations make the runner truly one-of-a-kind, reflecting your personal style and creativity․ Perfect for customizing your home decor or crafting gifts․ Easy to adapt and endlessly customizable․
Finishing Touches
Add the perfect final details to your table runner․ Topstitch for a polished look, or add matching buttons for a decorative touch․ A reversible design option adds versatility, ensuring your runner looks stunning from both sides․ Complete with a final press to achieve a professional finish․ These simple steps elevate your project, making it a beautiful and functional addition to any table setting․
Adding Matching Buttons
Enhance your table runner with matching buttons for a decorative and functional finish․ Simply sew buttons to each end of the runner to secure the flaps in place․ This adds a charming detail while ensuring the runner stays neatly folded․ Choose buttons that complement the fabric colors for a cohesive look․ The buttons not only add visual interest but also provide a practical way to keep the runner in position․ This small addition makes the project stand out, giving it a polished and professional appearance․ It’s a perfect way to personalize your runner with minimal effort and time․
Optional: Reversible Design
Make your table runner reversible for added versatility and style․ By using two coordinating fabrics, you can create a design that looks stunning on both sides․ Simply place the fabrics right sides together, stitch the long edges, and press the seams․ When turned right side out, the runner will have a professional finish with no visible seams․ This option allows you to switch up the look of your table effortlessly, making it perfect for different occasions or seasonal themes․ The pattern’s design ensures that both sides of the runner are equally appealing, providing double the style with minimal extra effort․
Final Pressing for a Professional Look
The final pressing is essential for achieving a polished, professional finish․ Use an iron and ironing board to press the entire runner, ensuring the seams lie flat and the fabric drapes smoothly․ Press both sides of the runner to create a crisp, neatly finished appearance․ This step is quick but transformative, giving your table runner a store-bought look․ Proper pressing ensures the fabric lies flat, highlighting the pattern and design․ It also helps the runner drape evenly on the table․ Take a moment to press carefully, as this step completes the project and ensures a professional, high-quality result․

Tips and Variations
Enhance your table runner by experimenting with orphan blocks, seasonal themes, or reversible designs․ Add accent strips for a pop of color or texture to personalize your project․
Using Orphan Blocks for a Unique Design
Breathe new life into leftover fabric scraps by incorporating orphan blocks into your table runner․ These small, unused pieces can add a charming, eclectic touch to your project․ Simply cut the blocks to a consistent size and arrange them along the runner’s length․ This method not only reduces waste but also creates a one-of-a-kind design․ For a cohesive look, frame each block with coordinating fabric or mix-and-match patterns for a vibrant, patchwork effect․ This technique is perfect for quilters looking to utilize remnants and showcase their creativity․ It’s a great way to make your table runner truly special and personalized․
Creating a Seasonal Theme
Elevate your table runner by tailoring it to match any season or holiday․ Use festive fabrics like pumpkin prints for autumn, snowflakes for winter, or floral patterns for spring․ Add seasonal accents such as ribbons, buttons, or appliques to enhance the theme․ For example, incorporate red and green tones for Christmas or pastels for Easter․ This customization allows your runner to complement your home decor throughout the year․ It’s a simple way to bring a fresh, seasonal touch to your dining table without extra complexity․ The quick design makes it easy to create multiple runners for different occasions, ensuring your table always looks celebrating and elegant․
Adding Quilting for Extra Texture
Add a professional touch by incorporating quilting into your table runner for added texture and visual interest․ Simple straight-line stitching or more intricate free-motion patterns can enhance the design․ Use a walking foot for even stitching or experiment with decorative threads for a personalized look․ Quilting adds depth and durability, making the runner more robust; While it extends the project beyond 10 minutes, the result is well worth the extra effort․ Consider layering batting for a padded effect, ideal for protecting surfaces from heat or spills․ This step transforms a quick project into a timeless, polished piece perfect for any setting․ Quilting elevates functionality and aesthetics effortlessly․

Accessing the PDF Pattern
Easily access the 10 Minute Table Runner PDF pattern by visiting the provided direct link․ This free printable guide is perfect for beginners and experienced sewers alike․
Downloading the Free Printable Pattern
Downloading the 10 Minute Table Runner PDF is quick and easy․ Simply click the direct link provided, and save the file to your device․ Ensure you have a PDF reader installed to open and print the pattern․ The document includes detailed instructions, fabric requirements, and step-by-step guides to help you create your table runner efficiently․ Perfect for those new to sewing, this pattern is designed to be user-friendly and accessible․ Once downloaded, you can print it immediately and start your project right away․ This convenient option allows you to work at your own pace, making it ideal for beginners or those short on time․
Direct Link to the PDF
Access the 10 Minute Table Runner pattern instantly with our direct link․ Click the provided URL to download the free printable PDF․ This ensures a seamless start to your project․ The PDF includes all necessary details, from fabric requirements to step-by-step instructions․ Designed for convenience, it’s perfect for quick reference․ Save time by printing it immediately and begin crafting your table runner․ This direct link offers an efficient way to get started, making the pattern readily available without additional searches․ It’s ideal for sewists of all skill levels, ensuring you can begin your project without delay․ The direct link is your key to a fast and enjoyable sewing experience․
The 10-Minute Table Runner is a quick, easy, and versatile project perfect for any skill level․ It’s ideal for gifts or adding a personal touch to your home decor․
Final Thoughts on the Project
The 10-Minute Table Runner is a delightful and practical sewing project that combines simplicity with creativity․ Perfect for beginners or experienced sewists alike, it offers a quick way to enhance any table setting․ The pattern’s versatility allows for endless customization, making it ideal for gifts, seasonal decor, or personal use․ Whether you’re using leftover fabric scraps or showcasing a favorite print, this project delivers satisfaction and a professional finish in minimal time․ Its ease and adaptability make it a standout choice for anyone looking to add a personal touch to their home decor or create a thoughtful, handmade gift․
Encouragement to Try the Pattern
Don’t hesitate to dive into the 10-Minute Table Runner project—it’s a perfect way to explore your creativity while accomplishing something practical in no time! Whether you’re a seasoned sewer or just starting out, this pattern is designed to inspire confidence and deliver quick results․ It’s a great way to use up small fabric scraps or showcase a favorite print․ The satisfaction of completing a beautiful, handmade table runner in just minutes is incredibly rewarding․ Give it a try and see how effortlessly it can transform your dining table or become a thoughtful gift for loved ones․ Sewing has never been so fast or fun!